Strings
How to hold a violin and bow
Nothing about holding a violin is intuitive, and everything about the sound depends on getting it approximately right in the first month.
By Sawyer V. · Published · Last updated
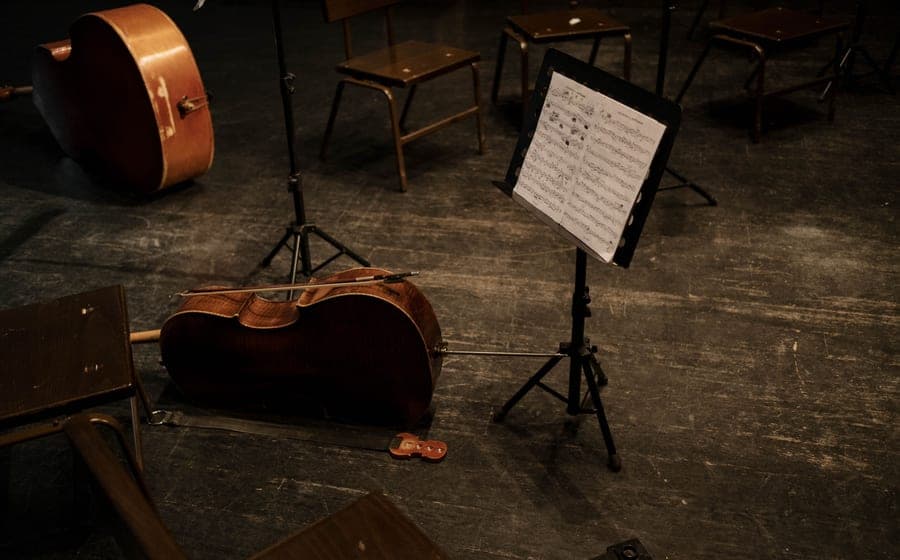
The violin is the least intuitive instrument we cover. Nothing about the playing position resembles a natural way to hold an object, and the sound is entirely at the mercy of a bow arm that has no reference points.
Which is why the first month matters disproportionately. Habits set here are hard to change, and the most common ones actively prevent a clean sound.
Rest the violin on your collarbone and hold it with the weight of your head through the jaw, not by gripping with the shoulder or the left hand. Hold the bow with curved, relaxed fingers and a bent thumb. Draw the bow parallel to the bridge, and let its weight do the work rather than pressing.
Holding the violin
It sits on the collarbone, not the shoulder. The back of the instrument rests on the collarbone with the chin rest under the left side of your jaw. The shoulder does not lift to meet it.
The head holds it. Let the weight of your head rest through the jaw onto the chin rest. That is enough. A violin held correctly stays put with no hands at all, which is the test.
The left hand supports, it does not carry. The neck rests in the crook between thumb and index finger, lightly. If the left hand is holding the instrument up, it cannot move freely along the fingerboard, and shifting becomes impossible.
Angle it slightly left and slightly up. The scroll points away from you at roughly forty-five degrees and sits a little above horizontal. Level or drooping makes the bow arm work uphill.
The shoulder rest
There is a gap between the back of a violin and most people’s collarbone, and a shoulder rest fills it.
Without one, players tend to raise the shoulder to close the gap, and a raised shoulder held for twenty minutes becomes neck and back tension. That is why most teachers start beginners with a rest.
It is a genuine debate among advanced players — some prefer the direct contact and the resonance of playing without one — and it is not a debate a beginner needs to have. Use one, adjust its height so the violin sits level without your shoulder rising, and revisit the question in a few years.
A student outfit like the Stentor Student II Violin Outfit#ad includes the instrument, bow, case and rosin; a shoulder rest is frequently the item you add. The full list is in violin accessories you actually need.
Holding the bow
The bow hold looks fussy and every part of it has a reason: it has to be secure enough to control and loose enough to let the bow flex.
Thumb bent, tucked in. The tip of the thumb rests at the corner where the frog meets the stick, and it is bent. A straight, locked thumb is the single most common fault and it stiffens the whole hand.
Middle two fingers opposite the thumb. They drape over the stick, curved.
Index finger slightly further along. This is the finger that applies weight into the string.
Little finger curved, on top of the stick. It balances the bow at the frog end. A collapsed, straight little finger is the second most common fault.
Everything relaxed and curved. If the hand looks tense, it is. A tight grip transmits every tremor straight into the string, which is exactly what makes a beginner sound shaky.
Bow tension and rosin
Tighten the bow before playing until there is roughly a pencil’s width between the hair and the stick at the middle. Never so far that the stick goes straight — the curve is what makes the bow work.
Loosen it after every single session. A bow left tight gradually loses its camber, and on a student bow that is a replacement rather than a repair. This is the most important care habit in string playing and it is covered in how to care for a violin.
Rosin makes the hair grip the string. A few passes before playing is enough; beginners consistently apply far too much, which sounds gritty and coats the instrument in dust.
Drawing the bow
Parallel to the bridge. The single most important thing about bowing. The bow travels in a straight line at right angles to the strings, staying the same distance from the bridge throughout the stroke. A bow that drifts toward the fingerboard or the bridge mid-stroke produces the scratch every beginner recognizes.
This is hard because the natural arc of an arm is a curve, not a line. Practicing in front of a mirror is the standard fix and it works.
Between the bridge and the end of the fingerboard. Roughly halfway is the default. Closer to the bridge is louder and more intense and demands more control; closer to the fingerboard is softer and flutier.
Weight, not pressure. Let the arm’s weight fall through the index finger into the string rather than pushing down. Pressing chokes the string and produces a crunch.
Speed matters as much as weight. A faster stroke is louder. Beginners try to get volume by pressing, which is the wrong lever.
The three faults teachers see most
Gripping with the left hand. Makes shifting impossible and causes wrist strain. Check by removing the left hand entirely — the violin should stay put.
A straight, locked thumb on the bow. Stiffens the whole hand and removes any flexibility from the stroke.
A bow that is not parallel. The direct cause of most scratchy sound. Use a mirror.
Before you blame your technique
Two things are worth eliminating before concluding the problem is you.
Is it in tune? Playing an out-of-tune instrument is discouraging and it actively trains the ear wrongly on a fretless instrument. Use a Snark clip-on chromatic tuner#ad every time — the method is in how to tune a violin.
Is it the right size? A violin one size too large cannot be held in the position described above, and no amount of correct technique compensates. Measure properly against violin sizes by age.
What we would buy
Stentor Student II Violin Outfit
StentorBest for: First violin, every size
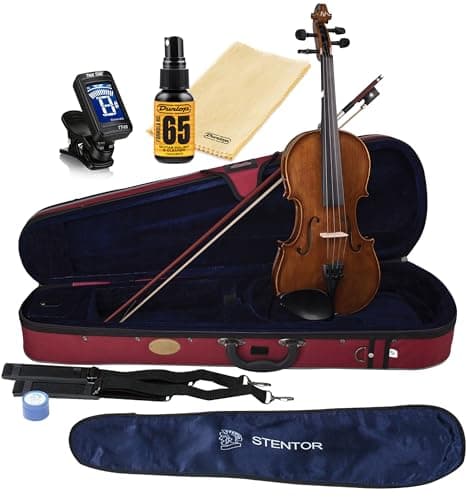
Solid carved spruce and maple with an ebony fingerboard, set up in a workshop before shipping, and made in five fractional sizes. The workshop setup is the specification that matters most on a beginner violin.
Published specifications
- Top:
- Solid carved spruce
- Back / sides:
- Solid figured maple
- Fingerboard:
- Ebony
- Pegs:
- Ebony or rosewood
- Sizes:
- 4/4, 3/4, 1/2, 1/4, 1/8
- Strings:
- Steel core, factory fitted
- Outfit:
- Wooden bow with ebony frog and natural horsehair, rosin, shaped lightweight case with music pocket and rucksack straps
What it gets right
- Ebony fingerboard and pegs, not stained hardwood — a stained fingerboard wears through and a soft peg will not hold a tuning
- Individually set up in a workshop before it ships, which is the single biggest variable on a cheap violin
- Available in five fractional sizes, so the same instrument family covers a child from about age five to adult
Where it gives ground
- The supplied steel-core strings are the first upgrade most teachers suggest
- The bow is functional rather than good; it is the second upgrade
What it is not good at
Being bought without measuring. Violin size is set by the player's arm length, not their age, and a violin one size too big is genuinely unplayable rather than merely awkward. Measure first.
How the specs score against a beginner’s needs
Scores are our reading of the published specifications above against what a beginner physically needs. They are not test results — we have not played this instrument.
Specifications from Stentor Music — Student II violin outfit.
Snark clip-on chromatic tuner
SnarkBest for: Tuning anything with strings
Clips to the headstock and reads pitch from the vibration of the wood, so it works in a noisy room and an adult who plays nothing can tune the instrument in twenty seconds.
Published specifications
- Type:
- Clip-on chromatic
- Sensing:
- Vibration through the headstock, not the microphone
- Fits:
- Guitar, bass, ukulele, violin, mandolin
- Display:
- Full-color rotating screen
What it gets right
- Vibration sensing means it works in a room with a television on, which a microphone tuner does not
- Chromatic, so one tuner covers every instrument in the house
- The rotating display means it reads correctly whichever way the instrument is held
Where it gives ground
- The clip is plastic and it is the part that eventually breaks
- Battery-powered, and it will be flat the one time you need it in a hurry
What it is not good at
Wind and brass instruments. It reads vibration through a solid body, so there is nothing for it to clip to on a flute or a trumpet.
How the specs score against a beginner’s needs
Scores are our reading of the published specifications above against what a beginner physically needs. They are not test results — we have not played this instrument.
Specifications from Snark tuners (retail listing with published feature set).
Questions people actually ask
How do you hold a violin correctly?
On the collarbone, held by the weight of the head through the jaw rather than by gripping. The left hand supports the neck lightly and does not carry the instrument, because a hand that is holding the violin up cannot move between notes.
Do you need a shoulder rest?
Most beginners benefit from one. It bridges the gap between the back of the violin and the collarbone so the instrument sits stably without the shoulder lifting to meet it. Whether to use one is genuinely debated among advanced players.
Why does my violin sound scratchy?
Almost always bow position or bow pressure. A bow that drifts away from being parallel to the bridge, or is pressed rather than drawn, produces a scratch regardless of what the left hand is doing.
How tight should a violin bow be?
About a pencil’s width between the hair and the stick at the middle. Never tight enough that the stick straightens — that removes the camber the bow depends on and eventually damages it.
Sources
Still deciding?
Every recommendation on this site is built the same way, and the method is published in full — including what we do not do and what would get a pick dropped.
Read next
- Best beginner violins: measure first, then buy
Arm-length sizing chart, why workshop setup is the spec that matters most, and one pick available in five sizes.
- How to tune a violin
Fine tuners versus pegs, the correct order, how to stop a peg slipping, and the two mistakes that cause real damage.
- Violin accessories you actually need
The shoulder rest and tuner that outfits leave out, what to upgrade first, and which popular accessories to skip.
- How to look after a violin
The after-playing routine, why bow hair must be loosened, how much rosin is too much, and the bridge check nobody is taught.
- Violin sizes by age and arm length
The full fractional chart by arm length, how to measure, and why a violin one size too big cannot be played correctly.