Drums
How to set up a drum set
Everything on a kit is positioned relative to your body, which means the first decision is where you sit and every other decision follows from it.
By Sawyer V. · Published · Last updated
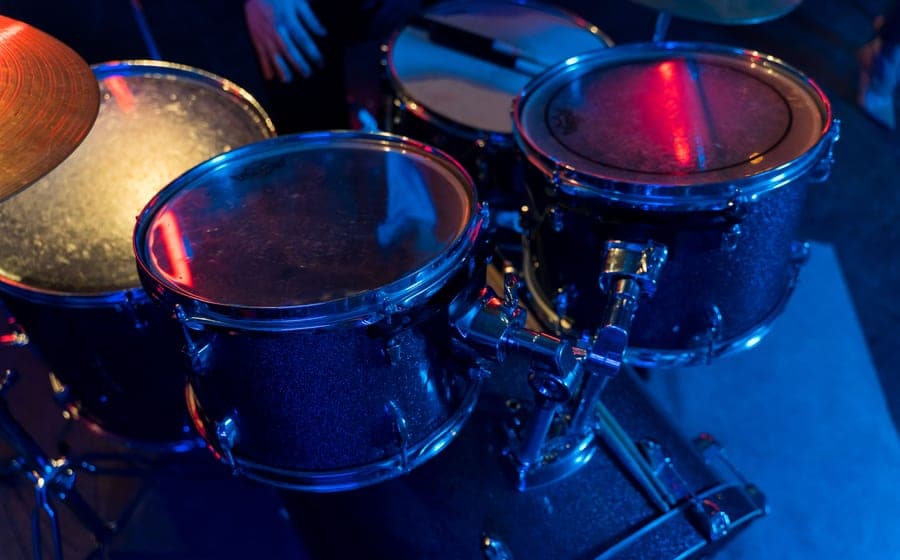
A drum kit is the only instrument in this category that has to be assembled around the player, and it is the only one where the assembly is itself a skill. Two identical kits set up differently are genuinely different instruments to play.
Almost every beginner sets one up in the wrong order, which means positioning everything twice and usually settling for something slightly wrong.
Build the kit from the throne outward: throne, bass drum and pedal, snare, hi-hat, toms, cymbals. Set the throne so your thighs slope slightly downward and both heels reach the pedals comfortably. Keep drums close to flat and close to you.
Start with the throne, always
Every other piece of the kit is positioned relative to your body, so your body has to be in its final position before anything else is placed.
Set the height so that when you sit with both feet on the pedals, your thighs slope very slightly downward from hip to knee. Sitting too low is by far the more common mistake: it bends the knees past ninety degrees, which reduces leg power and makes controlling the heel awkward on both pedals.
Sit toward the front half of the seat rather than back in it, so the legs can move freely. And then check the height again after ten minutes of playing, because the position that feels right when you sit down is not always the one that feels right when you are working.
For a child, this is the setting that changes most often. Adjustability is not a convenience on a growing player, it is the whole point — and the sizes that fit at each age are in drum set sizes by age.
Bass drum and pedal
Place the bass drum in front of you and attach the pedal to the hoop. The drum should sit square, with the spurs down and extended enough that they take weight — that is what stops the kit walking away from you.
The beater should strike near the center of the head. Adjust the beater height on the shaft rather than trying to compensate elsewhere; a beater hitting high or low on the head gives an inconsistent sound and a strange feel.
Set spring tension in the middle to start with. Beginners commonly over-tighten it, chasing speed, and end up fighting the pedal on every stroke.
On a kit like the Pearl Roadshow RS525SC#ad, where the pedal is included as part of a complete package, this is also the component most worth upgrading later — feel improves noticeably before sound does.
Snare
The snare goes between your legs, and its height is the single most consequential adjustment after the throne.
Set it so that when your forearms are roughly parallel to the floor, the sticks meet the head naturally. Too low and you hunch forward; too high and the shoulders lift. Both cause fatigue that gets blamed on practice length rather than on geometry.
Keep it close to flat. A steep tilt toward you feels natural at first and causes the stick to strike at an angle that kills rebound, which makes everything harder and puts strain through the wrist. A very slight tilt is all you want.
Hi-hat
The hi-hat stand goes to your left if you are right-handed, with the pedal under your left foot. Position it so you can play it with your right hand crossed over the snare without your arms colliding.
Height matters: the cymbals should sit high enough that your crossed arm clears the snare comfortably. Beginners frequently set the hi-hat too low, which forces the right elbow up and blocks the snare hand.
Set the clutch so the top cymbal sits a short distance above the bottom one when the pedal is up. Too close and it chokes; too far and closing takes real effort.
Toms and cymbals
Toms come next, mounted above the bass drum or on legs. The rule is reach without lean: if you have to move your torso to hit a tom, it is too far away, and the movement will cost you far more in timing than the position gains you in comfort.
Keep them close to flat, for the same reason as the snare. Angle them very slightly toward you so the stick meets the head squarely.
Cymbals last, because they occupy whatever space is left. Set them just above tom height — high enough that sticks clear the drums, low enough that you are not reaching up. A slight downward tilt toward you lets the stick glance across the edge rather than striking into it, which sounds better and cracks fewer cymbals.
Do not tighten the wing nuts fully. Cymbals need to move freely on the felt; a clamped cymbal cracks.
Electronic kits are the same problem with a rack
A kit like the Alesis Nitro Max Kit#ad arrives as a rack rather than individual stands, which makes assembly faster and adjustment slightly more fiddly.
The principles are identical: throne first, pads positioned so nothing needs a lean, pads close to flat. The rack’s advantage is that once set it holds position permanently; its disadvantage is that everything is connected, so moving one pad often means loosening two clamps.
Two electronic-specific points. Route the cable loom before you finalise pad positions, or you will be undoing clamps to free a trapped cable. And put the whole rack on a rug or isolation mat — the pedals transmit impact into the floor regardless of headphones, which is the part of apartment drumming nobody warns you about. That argument is in best instruments for an apartment.
Mistakes that show up as pain
Throne too low. The most common one. Costs leg power and pedal control, and shows up as fatigue.
Everything angled too steeply. Reduces rebound, so you work harder for the same volume, and puts the strain into the wrists.
Cymbals too high. Looks like the pictures, means playing with the shoulders raised for an hour.
Kit spread too wide. Every reach is a lean, and leaning is where back trouble comes from.
No rug. The kit migrates during the session and you finish playing a setup nobody chose.
Then tune it
A well-positioned kit with badly tuned heads still sounds bad, and beginners routinely assume a cheap kit simply sounds that way. Frequently it does not — it is untuned.
Setup and tuning together are most of what separates a budget kit that sounds acceptable from one that sounds like a box of noise, and neither costs anything. The procedure is in how to tune a drum set, and the rest of the gear you need is in drum accessories you actually need.
What we would buy
Pearl Roadshow RS525SC
PearlBest for: Complete acoustic kit, teen and up
A full 22 inch kick, five drums, four stands, a pedal, a throne and cymbals, on 9-ply poplar shells with hand-cut bearing edges. Nothing else needs buying to play it.
Published specifications
- Configuration:
- 5-piece: 22x16 bass, 14x5.5 snare, 10x8 and 12x9 rack toms, 16x16 floor tom
- Shells:
- 9-ply poplar, 7 mm, hand-cut 45-degree bearing edges
- Hoops:
- 1.6 mm triple-flanged steel
- Hardware included:
- H-50 hi-hat, C-50 cymbal, S-50 snare stand, P-50 pedal, D-50 throne
- Cymbals included:
- 16" brass crash/ride, 14" hybrid hi-hats
- Also included:
- Two pairs of maple sticks, stick bag
What it gets right
- Genuinely complete — stands, pedal, throne, cymbals and sticks are all in the box, which almost never happens at this price
- Hand-cut 45-degree bearing edges on poplar shells; the edge is what lets a drum be tuned at all
- Triple-flanged steel hoops rather than the pressed hoops on the tier below
Where it gives ground
- The included brass cymbals are the weak point and the first thing anyone replaces
- A 22 inch kick is a full-size kit and needs the floor space of one
What it is not good at
Being quiet, or fitting a child. This is a loud acoustic kit at adult dimensions — a 22 inch bass drum puts the pedal where an eight-year-old's leg does not reach. For that buyer, see the kids' kits and the electronic options.
How the specs score against a beginner’s needs
Scores are our reading of the published specifications above against what a beginner physically needs. They are not test results — we have not played this instrument.
Specifications from Pearl Roadshow RS525SC published specifications (Percussion Source).
Alesis Nitro Max Kit
AlesisBest for: Apartments and shared walls
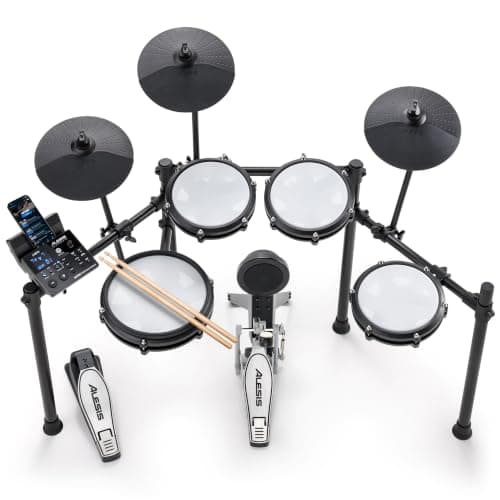
Mesh heads on every pad, a dual-zone snare and Bluetooth audio for playing along. Mesh is the spec that makes an electronic kit tolerable to sit at for an hour.
Published specifications
- Pads:
- 10" dual-zone mesh snare, three 8" mesh toms
- Cymbals:
- Three 10" pads — hi-hat, crash, ride
- Module:
- 440 sounds, 32 kits, 60 play-along songs, performance recorder
- Connectivity:
- Bluetooth audio, USB-MIDI
- Mounting:
- Included four-post rack
- Weight:
- Under 15 kg complete
What it gets right
- Mesh heads on every drum pad — quieter and far closer to a real rebound than the rubber pads a tier down
- Bluetooth audio means playing along to a phone with no cable and no extra mixer
- USB-MIDI, so it doubles as a controller for recording software later
Where it gives ground
- Mesh heads are quiet in the room but the kick pedal thumps through a floor; downstairs neighbors still hear it
- Single-zone toms — no rimshot on anything except the snare
What it is not good at
Teaching cymbal technique. Three 10 inch pads cannot reproduce how a real hi-hat or a crash responds, and a drummer moving to an acoustic kit later has that to learn from scratch.
How the specs score against a beginner’s needs
Scores are our reading of the published specifications above against what a beginner physically needs. They are not test results — we have not played this instrument.
Specifications from Alesis Drums — Nitro Max Kit.
Questions people actually ask
What order do you set up a drum kit in?
Throne, then bass drum and pedal, then snare, then hi-hat, then toms, then cymbals. Everything is positioned relative to where you sit, so setting the throne last means positioning every other piece twice.
How high should a drum throne be?
High enough that your thighs slope very slightly downward from hip to knee, with your heels able to reach both pedals without stretching. Sitting too low is the more common error and it costs you power and pedal control.
What angle should drums be at?
Close to flat. Steeply angled toms feel intuitive and cause the stick to strike at a poor angle, which reduces rebound and increases wrist strain. A slight tilt toward you is enough.
How close should the drums be?
Close enough that you can reach every drum and cymbal without leaning. If you have to move your torso to reach a crash, it is too far away, and the reach will show up as back ache long before it shows up as a missed hit.
Sources
Still deciding?
Every recommendation on this site is built the same way, and the method is published in full — including what we do not do and what would get a pick dropped.
Read next
- How to tune a drum set
The finger-tight starting method, what order to tune the kit in, and why a well-tuned cheap kit beats a badly tuned expensive one.
- Drum set sizes by age
Bass drum diameter by age with a reach test, and the throne-height problem that no chart can capture.
- Best beginner drum sets: complete kits for teens and adults
Complete acoustic and electronic kits for adult players, with the total-purchase problem and the noise question both addressed.
- Drum accessories you actually need
Sticks, a pad, hearing protection and a throne, in priority order, plus the upgrades that genuinely change how a cheap kit sounds.
- Best electronic drum sets for beginners
Mesh versus rubber pads, the kick-thump problem that headphones do not solve, and picks for adults and children.