Drums
How to tune a drum set
The skill that separates a kit that sounds like drums from one that sounds like boxes, and almost nobody is taught it.
By Sawyer V. · Published · Last updated
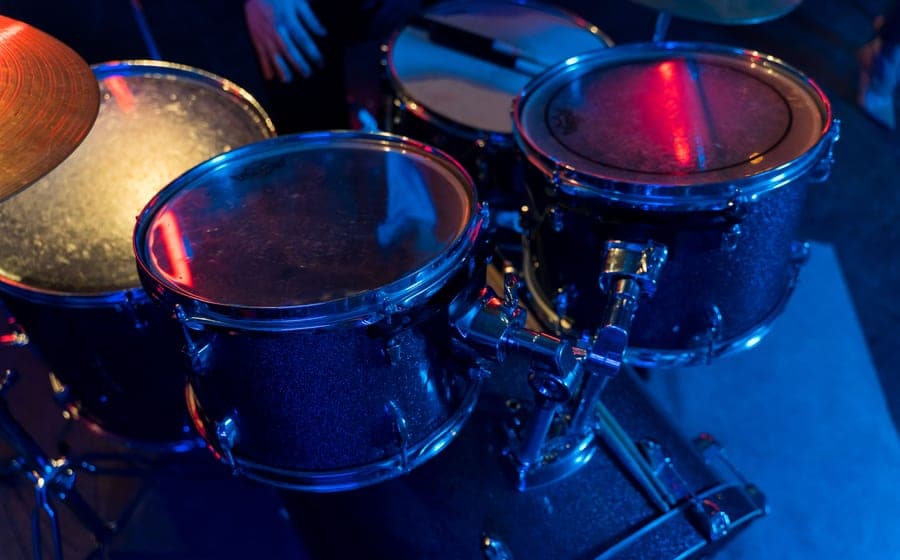
Drum tuning is the biggest gap between what a kit can sound like and what most beginner kits actually sound like. A well-tuned budget kit sounds like drums. A badly tuned expensive kit sounds like cardboard boxes, and the owner usually concludes they bought the wrong kit.
This is a beginner method. It is not the only way and it works.
Loosen every tension rod, then bring them all to finger-tight so the head is even. Then tighten in a star pattern — opposite rods, never around the circle — a quarter turn at a time until the pitch is where you want it. Tune the resonant head to roughly the same tension as the batter head.
What you need
A drum key. That is it. One comes with almost every kit including the Pearl Roadshow#ad, and they are cheap enough to own several because they vanish.
Take the drum off its stand and put it on a carpet or a bed, so the shell can vibrate freely and you can reach every rod. Tuning a tom while it is mounted is possible and harder.
The method, one drum at a time
1. Start from even, not from where it is
Loosen every tension rod on the batter head (the one you hit) until they are all finger-loose. Then finger-tighten each one until it just contacts — no key yet.
This is the step people skip and it is the important one. You cannot tune a head that starts uneven, because every adjustment fights the last. Starting from even means everything after it is predictable.
Press gently in the middle of the head with your palm at this point. You will often hear a small crackle as the head seats against the bearing edge. That is normal and you want it to happen now rather than halfway through a song.
2. Tighten in a star pattern
Never go around the circle. Tighten one rod a quarter turn, then the rod directly opposite it, then move on — the same pattern used for wheel nuts, and for the same reason.
Going around the rim pulls the head sideways and creates wrinkles you then have to chase. Opposite pairs keep the tension balanced as it rises.
Do a full circuit in quarter turns, then another. Stop when the pitch is somewhere you like.
3. Even it out by ear
Tap the head about an inch in from the rim, next to each tension rod in turn. Each tap should give the same pitch.
Where one is lower, tighten that rod a small amount. Where one is higher, loosen slightly. Work in eighth turns at this stage. This is the step that turns a drum with a muddy indistinct tone into one with a clear voice, and it takes a couple of minutes per drum.
4. Do the resonant head
The bottom head. Same process. As a starting point, tune it to roughly the same tension as the batter head — that gives a clear, sustaining note.
From there: tighter resonant than batter raises the pitch and adds a rising tone afterwards; looser drops it and shortens the sustain. Both are legitimate. Start even and adjust once you know what you want.
The order to do the kit in
Snare first, because it is the drum you hear most and the one that most affects whether the kit sounds right. Snare batter heads generally want to be fairly tight.
Then the toms, smallest to largest. Aim for a clear descending pitch across them — each larger tom lower than the one before. If two toms sound too close in pitch, the kit sounds indistinct no matter how well each individual drum is tuned.
Bass drum last, and generally quite loose. A bass drum is usually the least fussy drum on the kit; most of its character comes from muffling rather than tension.
On a small kit like the Mendini 16 inch junior set#ad the same process applies with fewer drums, and small shells are quick to work through.
The mistakes
Tuning around the circle instead of in opposite pairs. Creates wrinkles and uneven tension.
Over-tightening. Very high tension chokes a drum and, on cheap hardware, strips the lug threads. If a rod is getting genuinely hard to turn, you are past useful.
Reaching for tape too early. Beginners tape a ringing drum before tuning it. Most unwanted ring is uneven tension, and tuning it out sounds far better than damping it out. Tune first, then decide whether you still want muffling.
Expecting factory heads to be good. The heads on any entry kit are the cheapest part of it. A head change is inexpensive and makes a bigger difference than most upgrades — see what a first drum set should cost for where that sits among the running costs.
How often
Check the snare every few weeks and the whole kit every couple of months. Also after any significant change in temperature or humidity, and always after changing a head — a new head stretches for its first few hours of playing, exactly like a new guitar string.
What we would buy
Pearl Roadshow RS525SC
PearlBest for: Complete acoustic kit, teen and up
A full 22 inch kick, five drums, four stands, a pedal, a throne and cymbals, on 9-ply poplar shells with hand-cut bearing edges. Nothing else needs buying to play it.
Published specifications
- Configuration:
- 5-piece: 22x16 bass, 14x5.5 snare, 10x8 and 12x9 rack toms, 16x16 floor tom
- Shells:
- 9-ply poplar, 7 mm, hand-cut 45-degree bearing edges
- Hoops:
- 1.6 mm triple-flanged steel
- Hardware included:
- H-50 hi-hat, C-50 cymbal, S-50 snare stand, P-50 pedal, D-50 throne
- Cymbals included:
- 16" brass crash/ride, 14" hybrid hi-hats
- Also included:
- Two pairs of maple sticks, stick bag
What it gets right
- Genuinely complete — stands, pedal, throne, cymbals and sticks are all in the box, which almost never happens at this price
- Hand-cut 45-degree bearing edges on poplar shells; the edge is what lets a drum be tuned at all
- Triple-flanged steel hoops rather than the pressed hoops on the tier below
Where it gives ground
- The included brass cymbals are the weak point and the first thing anyone replaces
- A 22 inch kick is a full-size kit and needs the floor space of one
What it is not good at
Being quiet, or fitting a child. This is a loud acoustic kit at adult dimensions — a 22 inch bass drum puts the pedal where an eight-year-old's leg does not reach. For that buyer, see the kids' kits and the electronic options.
How the specs score against a beginner’s needs
Scores are our reading of the published specifications above against what a beginner physically needs. They are not test results — we have not played this instrument.
Specifications from Pearl Roadshow RS525SC published specifications (Percussion Source).
Mendini by Cecilio 16" Junior Kit
Mendini by CecilioBest for: Ages roughly 3-6, acoustic
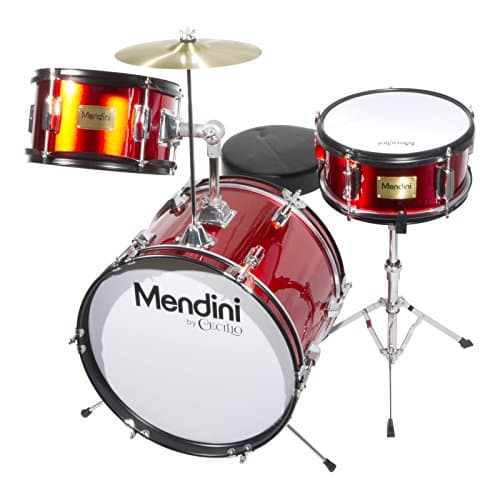
A three-piece with an 11x16 bass drum, real hardwood shells and triple-flanged hoops. It is the smallest acoustic kit where the pedal is actually where a small child's foot is.
Published specifications
- Configuration:
- 3-piece: 11"x16" bass with pedal, 6"x10" mounted tom, 5"x10" snare
- Cymbal:
- 9.5" with mounting arm
- Shells:
- Hardwood, triple-flanged hoops
- In the box:
- Wooden sticks, round padded adjustable throne
What it gets right
- A 16 inch bass drum puts the pedal within reach of a three- or four-year-old's leg, which no full-size kit does
- Triple-flanged hoops and hardwood shells, so it can genuinely be tuned rather than just hit
- Adjustable throne included, and at this age that is the part that has to move most
Where it gives ground
- Three pieces and one cymbal — this is a starting point, not a kit
- The included cymbal and pedal are the cheapest components and behave like it
What it is not good at
Anyone over about seven. Growth out of this kit is measured in a couple of years, and paying for it twice is worse than starting a six-year-old on a proper junior five-piece.
How the specs score against a beginner’s needs
Scores are our reading of the published specifications above against what a beginner physically needs. They are not test results — we have not played this instrument.
Specifications from Cecilio Music — Mendini kids drum set, 3-piece 16".
Questions people actually ask
Do drums need tuning?
Yes, and far more often than most beginners realize. Drum heads stretch and settle, temperature and humidity move them, and playing detunes them. A kit that has never been tuned since it left the box is almost certainly why it sounds bad.
What note should a drum be tuned to?
Drums are not tuned to specific pitches the way a guitar is. What matters is that every tension rod on a given drum is at the same tension, so the head has one clear fundamental rather than several fighting each other, and that the toms descend in pitch from smallest to largest.
How tight should drum heads be?
Tighter gives a higher pitch and more rebound; looser gives a lower, fatter, shorter sound. There is no correct absolute tension. Start from finger-tight and even, then move both heads together until you like it.
Why does my snare buzz when I hit a tom?
Sympathetic buzz, and a small amount is completely normal — every acoustic kit does it. If it is excessive, tighten the snare wires slightly, check they are centered, or retune the offending tom slightly away from the snare’s pitch.
Sources
Still deciding?
Every recommendation on this site is built the same way, and the method is published in full — including what we do not do and what would get a pick dropped.
Read next
- Best beginner drum sets: complete kits for teens and adults
Complete acoustic and electronic kits for adult players, with the total-purchase problem and the noise question both addressed.
- How much should a beginner drum set cost?
Four bands defined by completeness and hardware quality, with the shells-only trap and the real running costs.
- Drum set sizes by age
Bass drum diameter by age with a reach test, and the throne-height problem that no chart can capture.
- Best drum practice pads
Gum rubber versus neoprene, why 12 inches is the right size, and the honest limit of what pad practice builds.
- Acoustic vs electronic drums for beginners
Feel against practice hours, what transfers in each direction, and the building question that settles it. Buy paths for both.